Calibration boosts accuracy
While all operators should know how to calibrate sprayers, which they will have done as part of their PA2 or other PA module, it’s a task that may often be overlooked.
It is, however, a must do job: the Code of Practice for the Use of Plant Protection Products states sprayers should be in a good condition and calibrated for use. Farm assurance schemes require applicators to be regularly calibrated (which must be recorded). In the NSTS tests sprayers need to be calibrated during checks to ensure application rates are correct.
In practice, calibration can be considered as a test of the sprayer’s accuracy regarding the application rate required by the product label. This test will also provide operators with an opportunity to make any necessary adjustments to achieve the target application rate.
Step 1. Read the Label
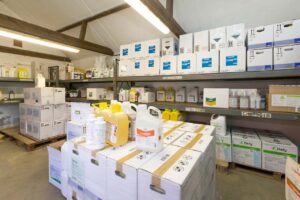
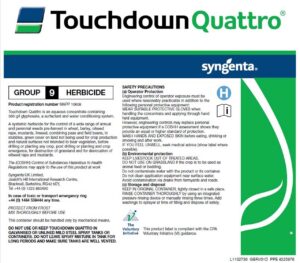
The first step in the calibration process is to read and understand the product label, or labels if applying a tank mix, to identify the key information required for the procedure. It’s always important to you are making applications in accordance with the product label and check any recommendations or guidance against the label.
From the product label operators should identify the product dose rate (litres/ha) and the maximum permitted product dose (litres/ha), which can be found in the ‘Important Information’ section of the label and must never be exceeded. Calibrating the sprayer can help ensure this.
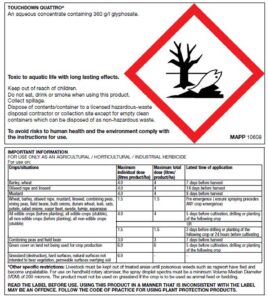
It is critical that products are diluted only in the recommended volumes of water (litres/ha). This is often given on labels as water volume range or application volume that products can be applied in. Where compatible products are being applied in a tank mix, operators should ensure a water volume is used that suits all the products in the tank mix.
At the same time you should check the label for the required spray quality, and any nozzle and pressure recommendations.
Step 2. Forward Speed
An essential part of accurate spraying is knowing the actual, real forward speed of the sprayer. Speedometer readings and wheel speed sensors can be inaccurate because of wheelslip, incorrect setting for the wheel size being used or faults. Forward speed data from the GPS or radar are often the most accurate readings, but they should still be checked to ensure accuracy.
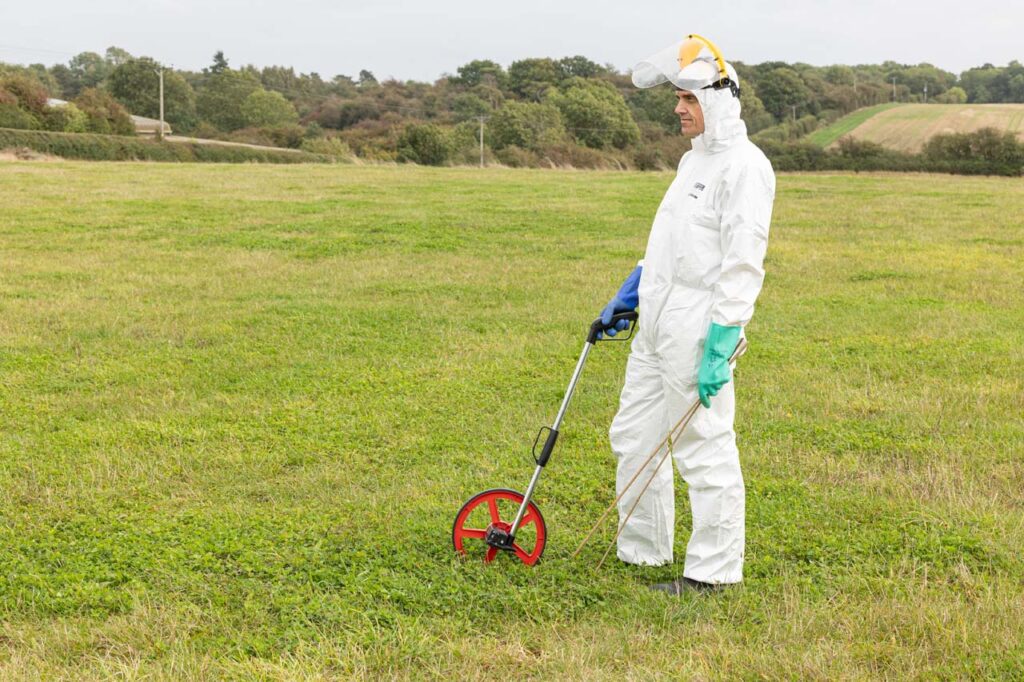
Accurately measure out a 100m distance and carefully record the time it takes to travel this at the desired sprayer speed. Only use forward speeds that provide acceptable boom movement and limit spray drift. Ensure you manually select a gear and rpm that delivers the correct PTO speed at the desired forward speed.
Be sure to check the speed using a ‘rolling start’ – when the sprayer is already at the set speed. You can do this by placing the start position a suitable distance away from the sprayer that allows it to reach the desired spraying speed before beginning of the 100m run. To achieve the most accurate measurement the sprayer tank should be half full.
Calculate the measured forward speed by using this calculation:

Some spray operators may think it’s not necessary to check the forward speed of their sprayer, because it has automatic rate controller. But it could be automatically incorrect. Also faults can occur and operators must be able to complete a spraying job in manual mode to ensure any diluted products are accurately applied.
Step 3. Calculate nozzle output (litres/min)
Now we need to establish the output per nozzle required to achieve the intended volume in litres/min.
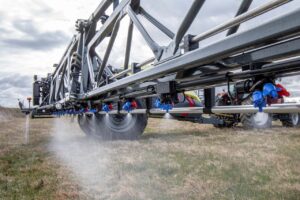
Measure the nozzle spacing on the sprayer boom (in metres). Most machines adhere to the standard nozzle spacing on 0.5m, but it’s good practice to check that they are at the correct spacing.
Calculate the nozzle output using the application using the formula below.

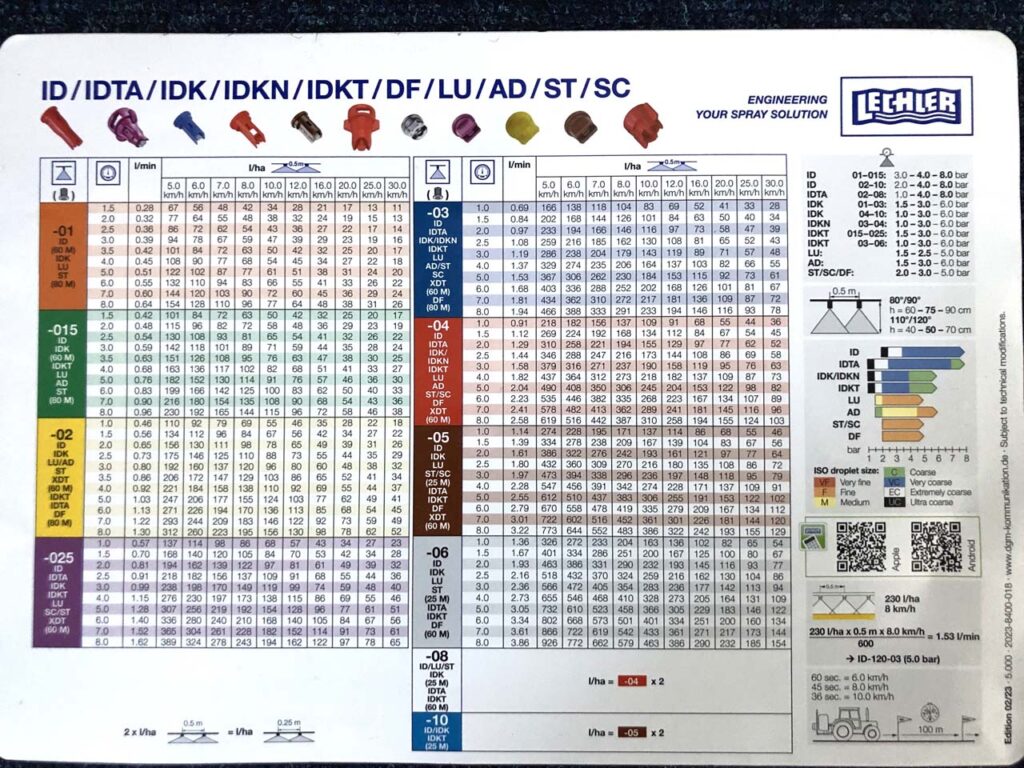
Step 4. Select the nozzle
After calculating the nozzle output required to achieve the desired application volume, the next step is to select a suitable nozzle to match, as well as deliver the spray quality stated on the label.
Use the nozzle manufacturer’s data charts to select the most suitable nozzle to meet the volume and droplet size requirements. The chart will also show the spraying pressure required.
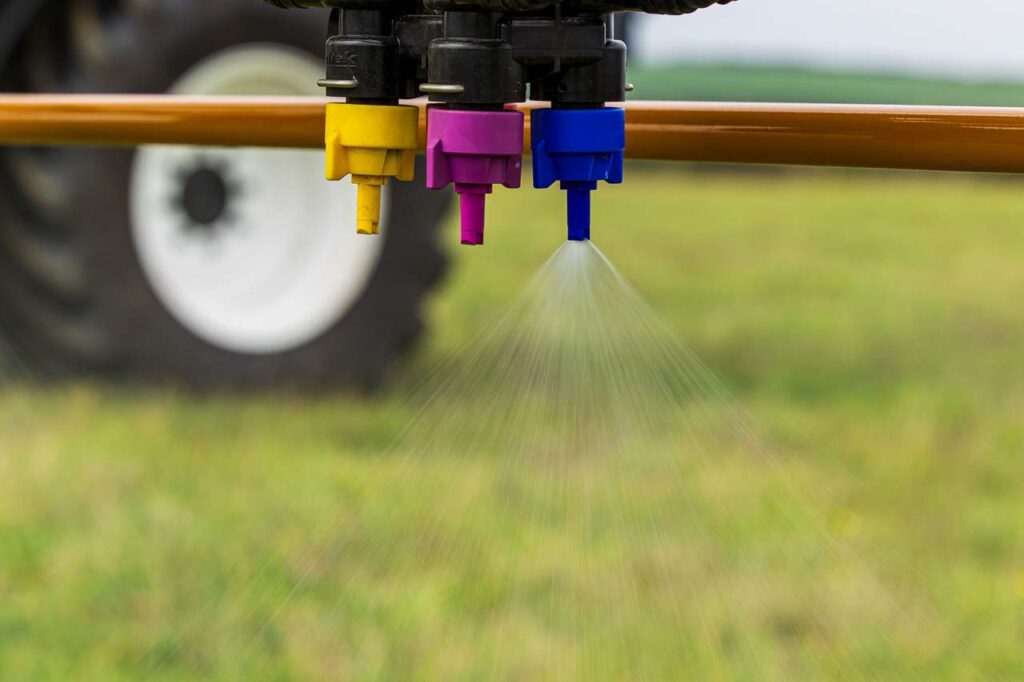
Step 5. Check Nozzles
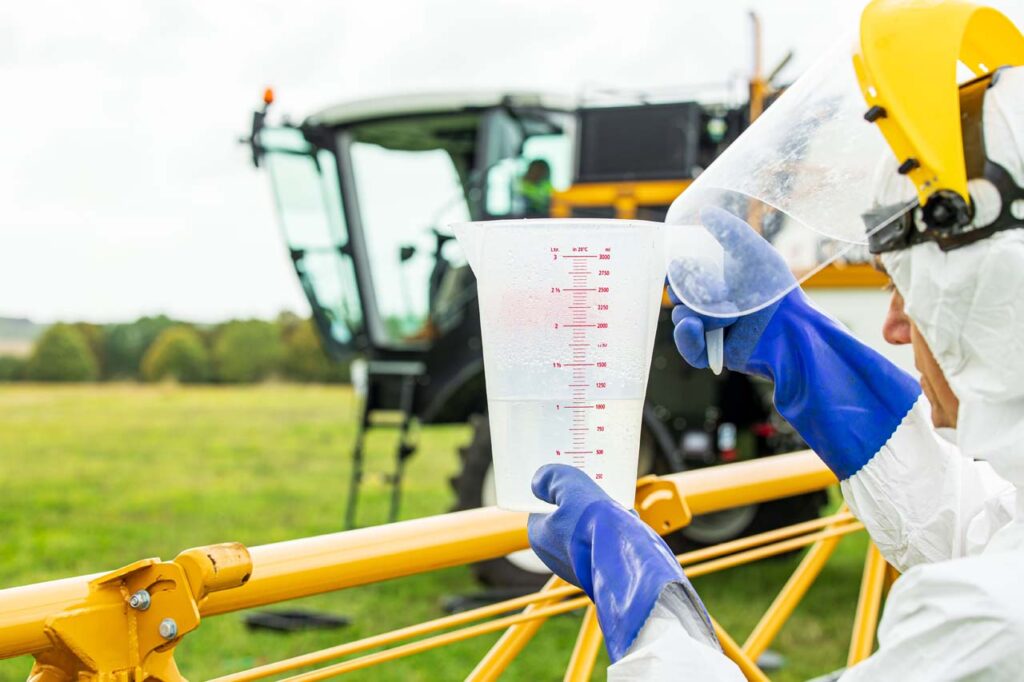
After selecting the correct nozzles, set the appropriate spraying pressure and, filled with clean water, turn on the sprayer and make a visual check of spray patterns. Replace any damaged or blocked nozzles.
Complete a jug test by collecting and measuring the flow from a nozzle in one minute. This will determine the flow in litres/min. Test at least one nozzle from every boom section and make a record of this.
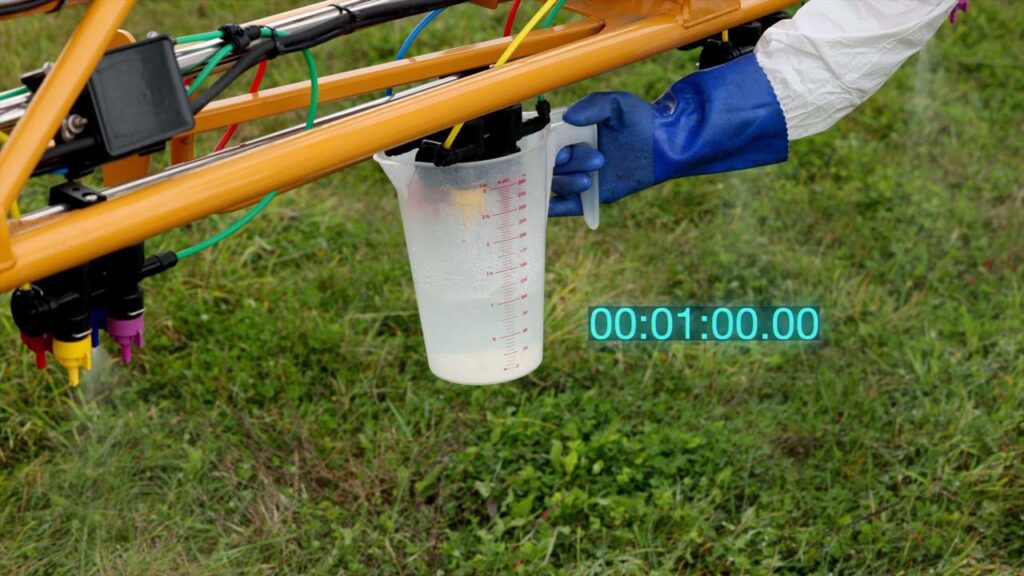
Check the flowrates achieved against the nozzle manufacturer’s data charts. Any that vary +/- 5% from the expected flow rates should be checked, retested or replaced as necessary.

Step 6. Calibration
Compare the nozzle output achieved with the calculated nozzle output determined in Step 3. If the output from all of the nozzles consistently differs by only a small amount from the calculated output, adjust the pressure and re-test.
If, however, the output differs by a large amount, then consider changing the nozzles to make greater adjustment of the flow rate (litre/min).
It is at this point operates may become aware of any inaccuracy in the pressure gauge. NSTS standards permit pressure gauges to be within 10% of the actual pressure. In practice this means a pressure gauge set to 2 bar pressure may achieve a flow rate expected between 1.8 and 2.2 bar.
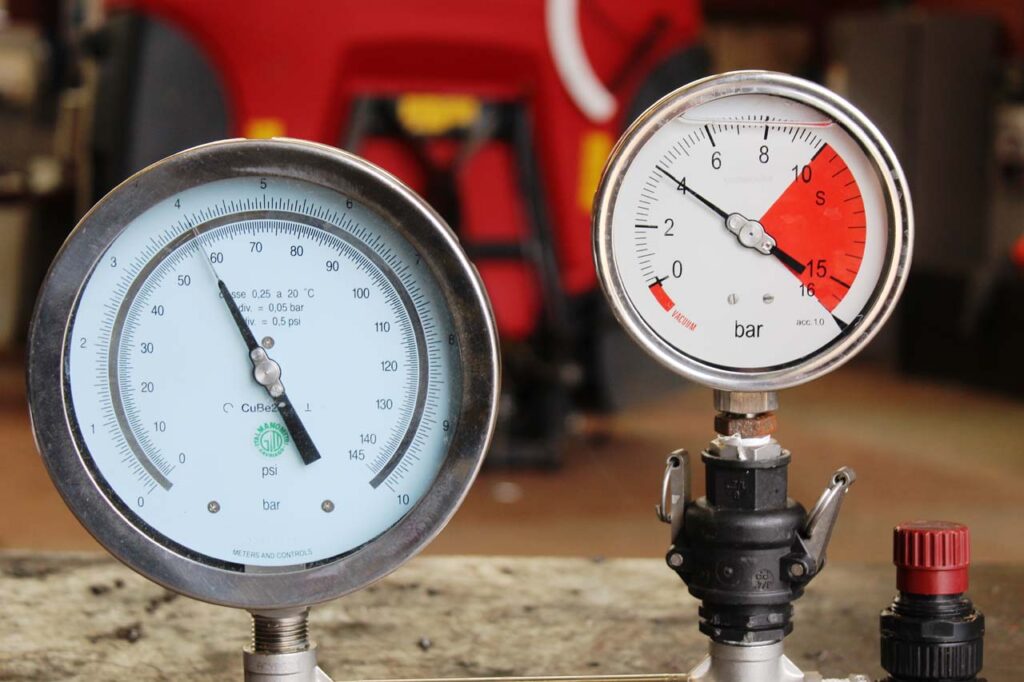
Operators should record the pressure gauge reading and the flowrate achieved and use this information to check the spray quality requirements of the label are being met by cross checking against the nozzle manufacturer’s data.
Record the results
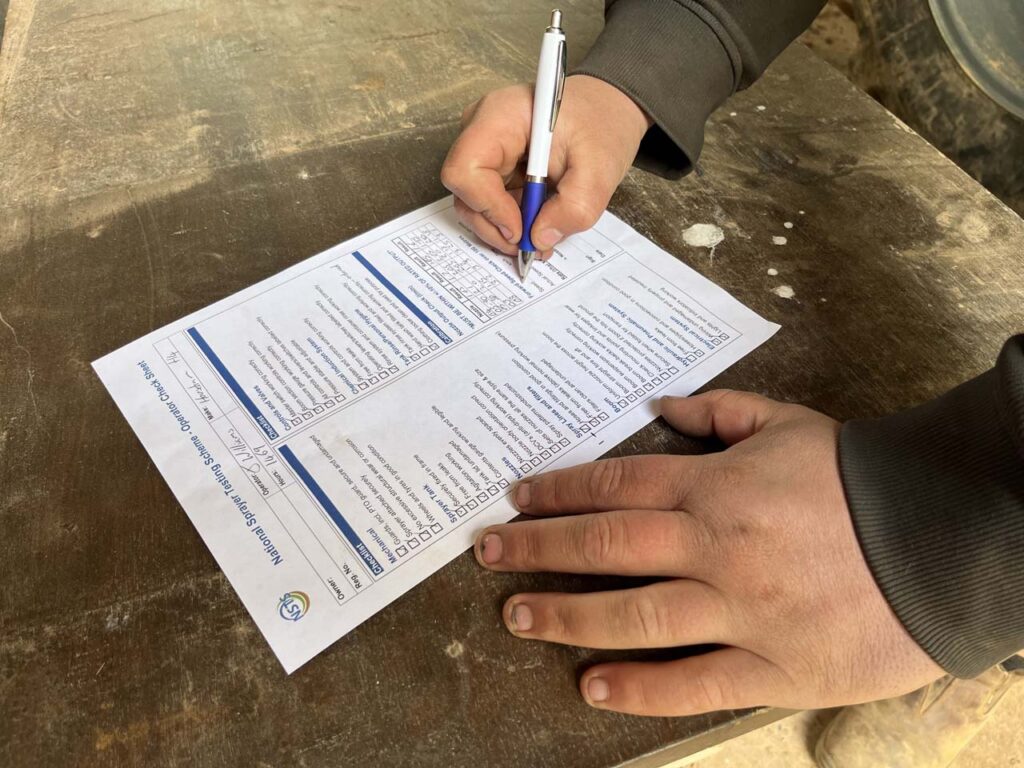
Any calibration that is performed on your sprayer must be recorded. Generally, calibration records will be reviewed as part of any third-party certification. Records should be legible and include the sprayer identification, result of testing and the person or company who undertook the test.
Calibration procedure
- Read the label product and application volume
- Calculate required nozzle output
- Test flowrate of one nozzle per boom section
- Adjust pressure or nozzle and re-test
- Record calibration data.